Still not found answer to your query, contact our support team at
Nowadays, advertising becomes an inseparable part of social networks. Whether it’s for a commercial or non-commercial purpose, advertising is a powerful tool to convey idea and perspective to users. Having an effective tool to create and manage the advertising is crucial to the growth of a social network.
Community Advertisements Plugin is creatively developed to serve this purpose. It’s a powerful tool that allows administrators to create and manage ad packages effectively. Advertisers have various tools to keep track of the progress of their ads.
Additionally, ads can be placed anywhere on your website, which provides advertisers many placement options to choose from. Variety in ad types - Boost Post, Content Ad, Page Ad & External Website Ad with different Types of Ads Formats - Carousel Ads, Single Image Ads & Videos Ads, flexibility and full control on every aspect make Community Ads a prime candidate for implementing an advertising system on your Website.
It enable users to create rich, targeted advertising campaigns on your site for promotion of businesses, websites, and even their content on site: like groups, events, videos, etc. Also users can have more Customers on your website and you can earn revenue through these Ads.
This Plugin provides you various new functionalities which make creation and management of Ads more easy and reliable. Multiple packages created by Admin enable users to choose the right plan for their campaigns.This advanced plugin enables advertising of elements from any content module. The ads from this plugin are more expressive and better looking than banner ads/simple text ads, and are much more likely to receive user attention and clicks.
Please read more about this Plugin here: https://www.socialnetworking.solutions/social-engine/community-advertisements-plugin/
Watch demo here: https://demo.socialnetworking.solutions/ads
This tutorial will walk you through steps you need to follow to install the Community Advertisements Plugin on your website.
** This tutorial assumes that you are already logged in to the Admin Panel.
Installation and Setup of this plugin is very easy, but if you still need our expert to install this plugin for you, then you can purchase the service from here: https://www.socialnetworking.solutions/social-engine/socialenginesolutions-plugin-installation/
Video Tutorial: With the written tutorial, we have created a video which will help you to setup and configure this plugin easily. Watch the below video:
Steps to Install & Setup Community Advertisements Plugin
In the Main menu, click on the tab Manage and select “Packages & Plugins”.

2. Please read the tutorial on installing plugins in SES here: http://help.socialnetworking.solutions/faq/51/how-to-purchase-and-install-ses-product
3. After the successful installation of plugin as in Step 2 above, go to “Plugins” dropdown in the Main menu and select “SES - Community Advertisements ”.
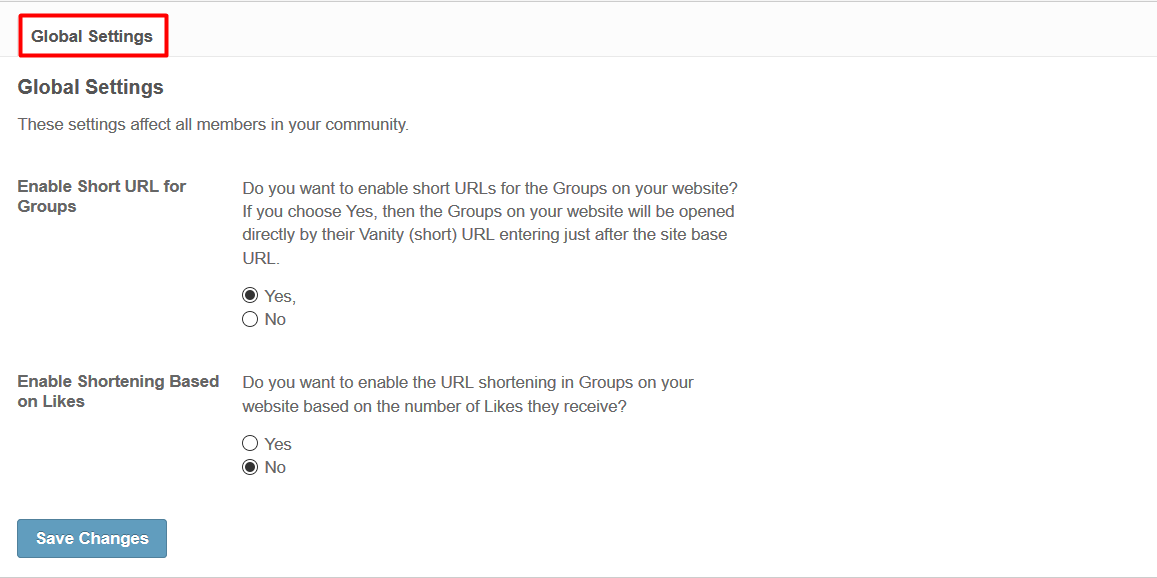
Activate the plugin from Global Settings section of this plugin. The settings which are provided under this section will affect all the members in your community.
Here you can enable various Settings for your Ads such as options for Package Information, Enable Category, Options for Call to Action Button, Location, Proximity Search and many more….
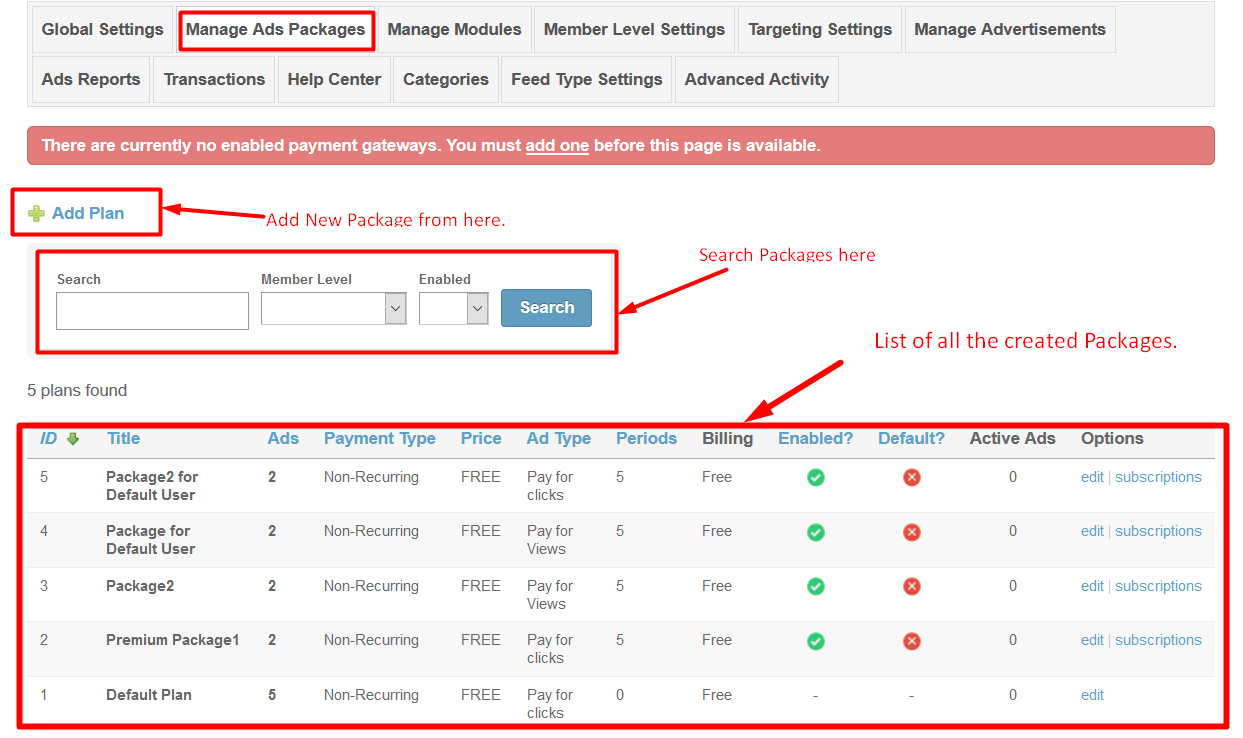
This section will provides you the right place for creation of Packages for Ads which your members will choose at the time of Ad Creation. These packages can be free or Paid depending upon your choice. From here you can create new package by clicking on ‘Add Plan’ Link which is provided at this page.While creating any package you can select member level to which that package will be visible.
Also you can choose module you want to enable for the Ad, Package Type(Recurring or Nonrecurring), Ad Type(Pay for Clicks, Pay for Views, Pay for Days) and can also set limit for them. If it is a Paid package, then you can set any desired price for your Ad Package.You can also make your Ads Approved, Featured, Sponsored. The Type of Ad can also be included in the package such as Boost Post, Promote Your Page, Promote Content, Get More Website Visitor. You can further enable other advanced feature for your package like you want to display your Ad in Carousel View, Single Video.You can also enable Networking and Targeting options for your Ads.
You can also mention number of Ads you want users to create under any particular Package Subscription. You can also make your Package Plan as Default for Ad Creation. Also you can search any Package under search bar by its Name, Member Level and Status as enabled or not.
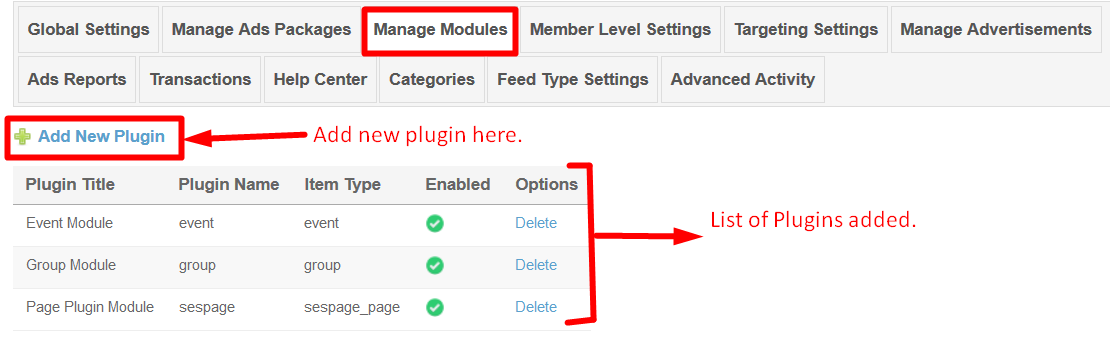
This section recognizes the Plugins you have included for Community Advertisement Plugin that you want to add into your Package while its creation. By adding the Module(Plugin) into your package you can make that package work only for that particular plugin. You can add any module by clicking ‘Add New Plugin’ link which is present at that page.
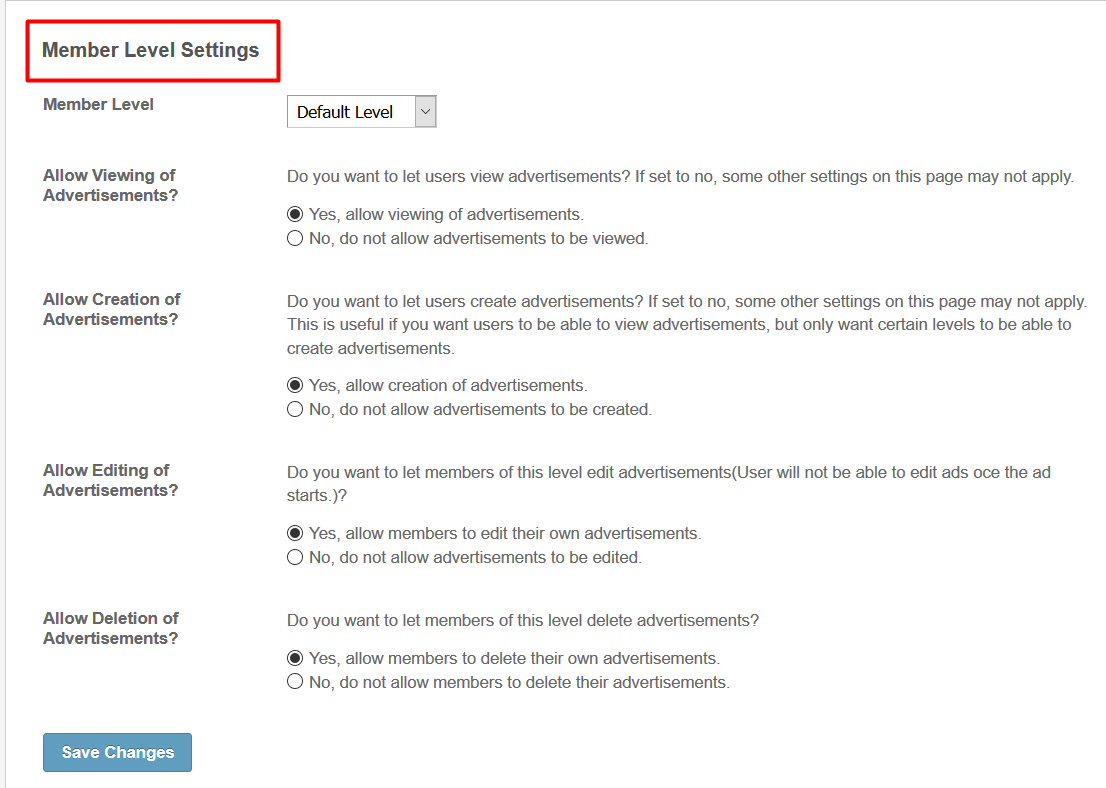
These Settings are applied as per member level basis. You can select the Member level and configure them as per your requirement, then adjust and modify those Settings for that level too.
With the help of these Settings you can easily provide certain privileges to one member level than others i.e; functionalities provided to one member level are not provided for other one.
You can allow members to Create, View, Edit and Delete Advertisements on your website.
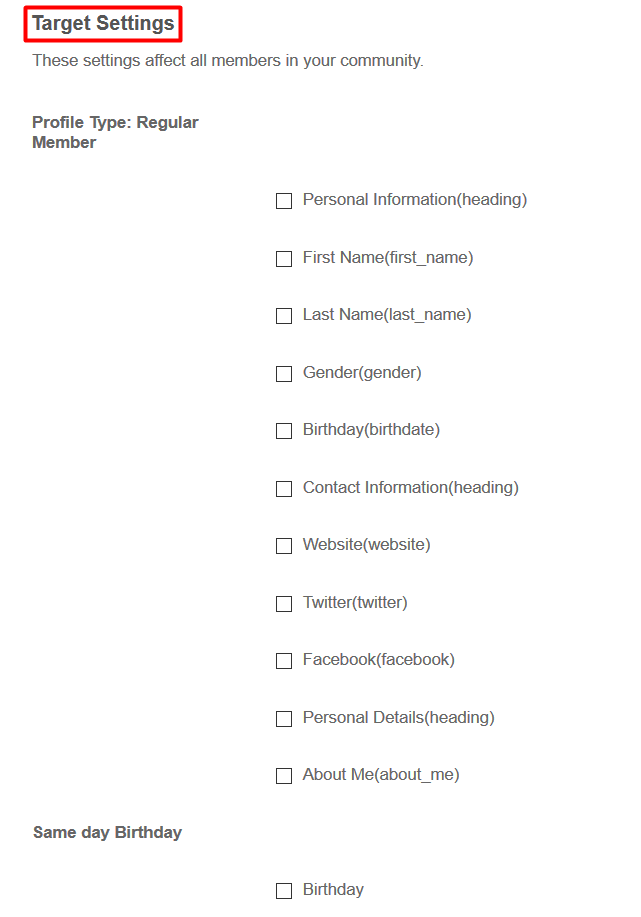
You can simply enable Targeting Settings for Ads on your website. These settings will affect all the members in your community. By configuring these settings you can allow only limited members who can view Ads if the answers to the profile Questions get match with the member’s profile.
These settings will depend upon the Profile types which you have created from Admin Panel. For now we have created Regular Member Type Profile only, But if you want to create more than one then you can create it from Profile Questions section under ‘Settings’ Tab which is present in Admin Panel. Question fields such as Personal Information, First Name, Last Name, Gender, Birthday etc. to the Profile Types will get displayed under this section.
With the help of Targeting Settings you can allow only specific people who can see the Ads on your website if the target criteria which you have set from Admin Panel matches with the Profile Criteria of the Members on your Website.
All the Ads created on your website get displayed under this section. Here you can mark any Ad as Approved, Sponsored and Featured.
Also all the details for the Ads get listed such as Title, Owner, Package, Price, Package Expiry Date, Creation date etc.Also you can View, Edit or Delete any Ad if you want.
This page also allows you to search any Ad by its respective fields such as Advertisement Title, Campaign Title, Type of Ad etc. y this you can easily search any Ad whenever you want.

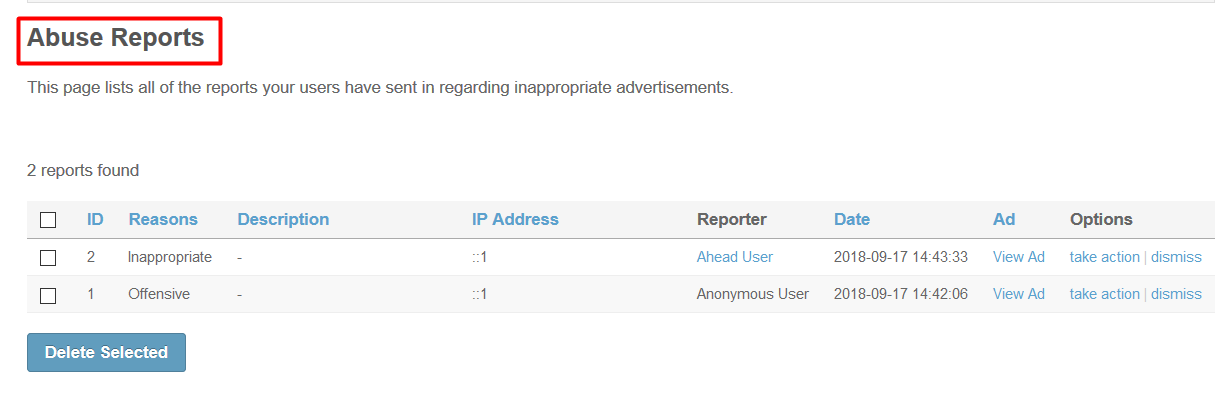
This page lists all of the reports your users have sent in regarding inappropriate advertisements.
Here you can find any Report which users have created if they found any Ad offensive or Abusive on your Website. You can also Search any Report by using Search Filters.
This page list all the payment transactions of the advertisement packages that Advertisement Owners have made on your site. You can use this page to monitor these package transactions. This section simply describes the Transactions which other members have made on your Website through payment Gateway PayPal.
This page also enables you to find any specific Advertisement Payment Transaction by entering the criteria into search Fields. If you want to see all the transactions on your Social Network then you have to leave the filter fields as blank.
![]()
12. Help Center
If user have any query or doubt in creating, managing and configuring their Ads on website, then they can refer this page.This page will help you out with all the Queries regarding Advertisements on your Website.
To create 2nd-level categories and 3rd-level categories, choose respective 1st-level and 2nd-level category from “Parent Category” dropdown on this page. As you will not be able to edit Parent Category later so fill it very carefully.To reorder the categories, click on their names or row and drag them up or down according to your choice.
Under this section you can configure Activity feed settings for different plugins such as Albums, Blogs, Classifieds, Activity, Music, Polls, Members, Videos, Events, Forum, Groups, Community Advertisements Plugin for boost a post type Ad on your website.
You can enable feed options for any plugin for which boost a post type Ad will work on your website.

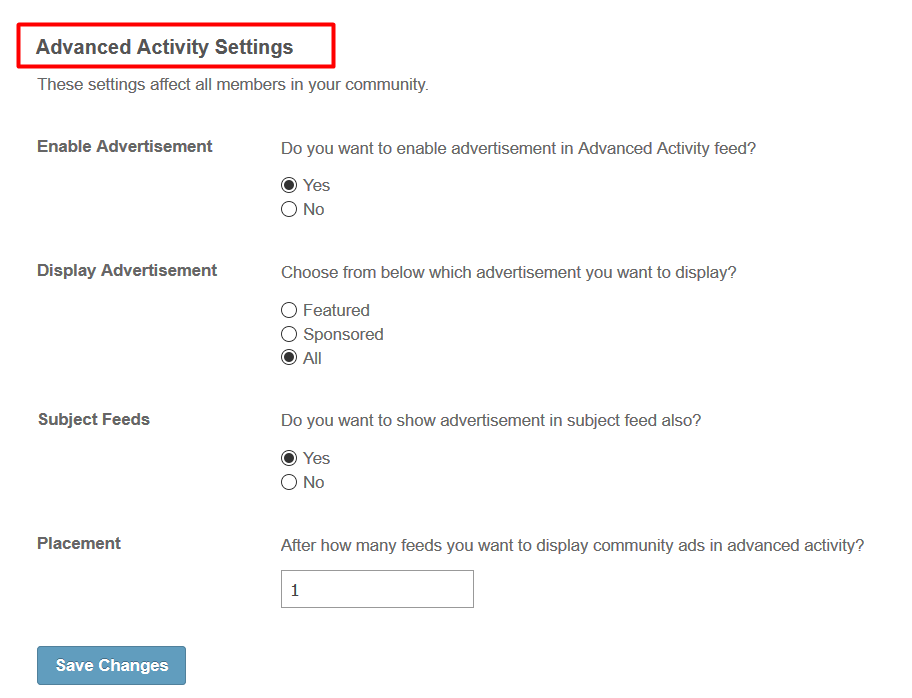
15. Advanced Activity Settings
This section in Community Advertisements plugin will only be enabled if Professional Activity & Comments Plugin is installed on your Website. Under this section you can enable Advertisements, Display of Advertisements, Enable Subject Feed(for Advertisements), Display of community Ad after how many Feed creation.
Layout Editor is the only place for our SES Products where you can place various widgets for your pages and configure those widgets according to your requirement as well.
There are certain pages for this plugin which are categorized as “SES - Community Advertisements Plugin - PAGE_NAME” in which you can place various widgets of this plugin that are also categorized as “SES - Community Advertisements Plugin - WIDGET_NAME” format.
Great! You have completed the installation and setup of this plugin now and you are able to create Advertisements of your choice.
Installation of this plugin is very easy, but if you still need our expert to install this plugin for you, then you can purchase the service from here: https://www.socialnetworking.solutions/social-engine/socialenginesolutions-plugin-installation/