Still not found answer to your query, contact our support team at
We always emphasis on having an attractive and elegant Website that can increase the involvement of Users and its ratings by them for what it has been made. A theme controls the general look and feel of your site including things like Page Layout, Widget Locations, and Default Font and Color Choices etc. New themes are always being added, keep checking for new designs: you can change your theme as often as you like.
So our new Responsive AtoZ theme is a Multipurpose theme which comes up with the Unique design and updated features which makes it totally different from other themes in every aspect. It will serve the purpose via which you can give a creative and outstanding look to your website by providing various settings for Landing page, Customizable Header & Footer, Pre- built Color Schemes, Manageable Banners, Adjustable Fonts for your Website. You can also send Newsletters to your website subscribers.
This theme provides you all the enhanced looks and functionality which you exclusively want for the transformation of your website. It is highly configurable with new Sign In and Sign Up CTA Buttons, Content Highlight option, Feature Blocks, Statistics Counter in Parallax, 6 Content Circle and Member Cloud for Landing Page, so you can easily make any modifications from the Admin Panel.
Responsive AtoZ Theme as the name suggests is well suited for all types of websites: Commercial websites, Personal websites, Community Building website, E-Commerce website, Informational website, Writers / Authors website, Mobile Device website, Photo Sharing websites, Directory websites and many more…...
Watch demo here: https://demo.socialnetworking.solutions/
This tutorial will walk you through steps you need to follow to install Responsive AtoZ Theme on your website.
** This tutorial assumes that you are already logged in to the Admin Panel.
Installation of this theme is very easy, but if you still need our expert to install this theme for you, then you can purchase the service from here: https://www.socialnetworking.solutions/social-engine/socialenginesolutions-plugin-installation/
Video Tutorial: In addition to this written tutorial, we have also created a video tutorial which will help you to setup and configure this theme easily. Watch the below video:
In the Main menu, click on the tab Manage and select “Packages & Plugins”.

2. Our theme is based on SE standards so this will get installed on your website as any standard theme can. Please read the tutorial on installing themes and pluginsin SE here: http://help.socialnetworking.solutions/faq/51/how-to-purchase-and-install-ses-products
3. After the successful installation of theme as in Step 2 above, you will see “SES - Responsive AtoZ Theme”.

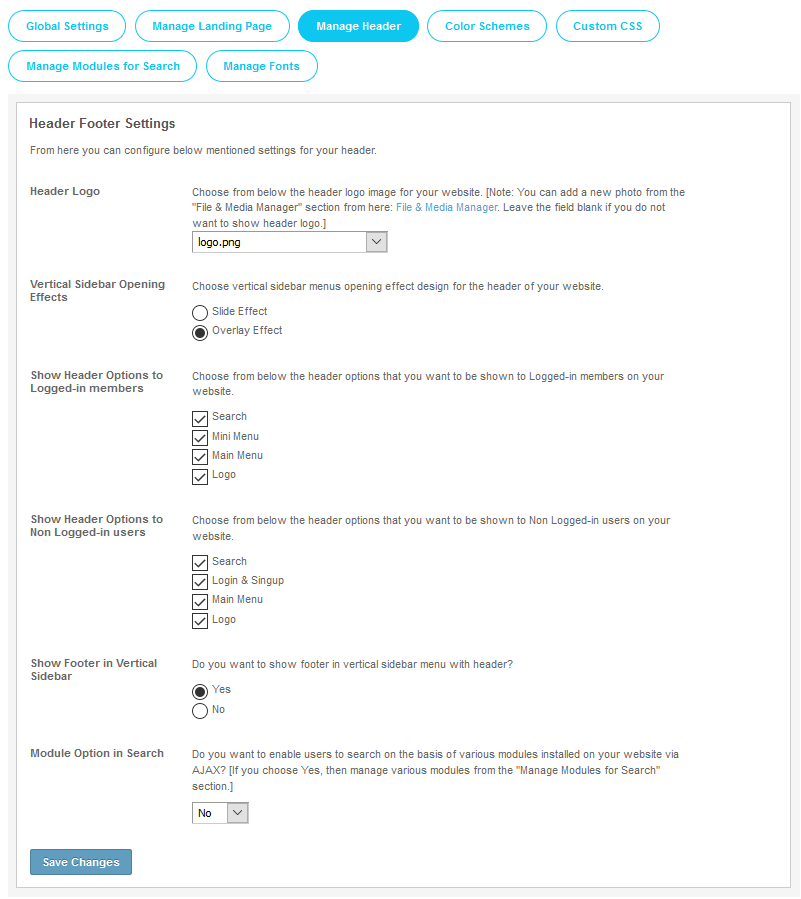
Activate this theme from the Global Settings section of this theme. These settings will affect all the members in your community.
You can configure various other basic settings such as Background Image for your website, Member Avatar Shape in Mini Menu, Left & Right Column Width of your website, Sign In & Sign Up PopUp Settings and many more….. for your theme from this section.
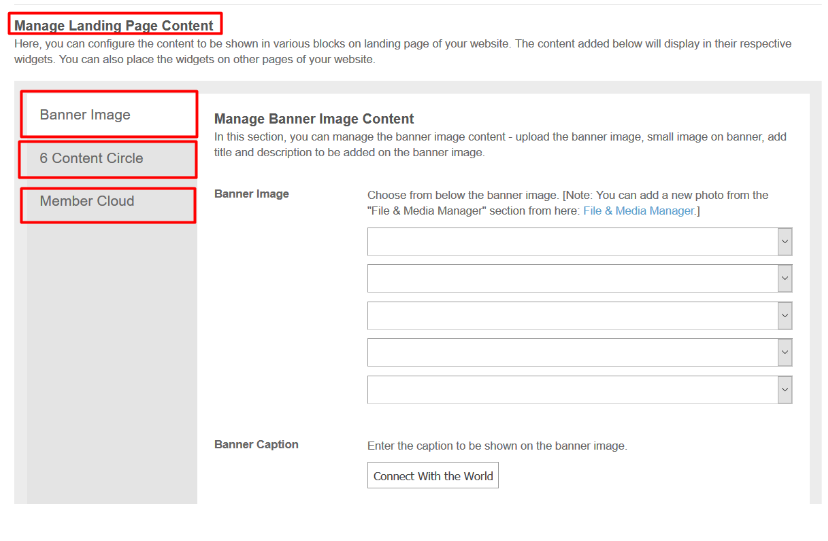
With this section you can configure the content to be shown in various blocks on Landing Page of your website. The content added below will display in their respective widgets. You can also place the widgets on other pages of your website. You can also place the widgets on other pages of your website.
This settings is further divided into three categories:
Manage Modules for Search
This page lists all the modules / plugins which are compatible for AJAX based search via this theme. Below, you can enable / disable any module and add / remove icon for them.
Manage Menu Icons
Here, you can manage & add icons for the Main Navigation Menu Items on your website. You can also edit and delete the icons.
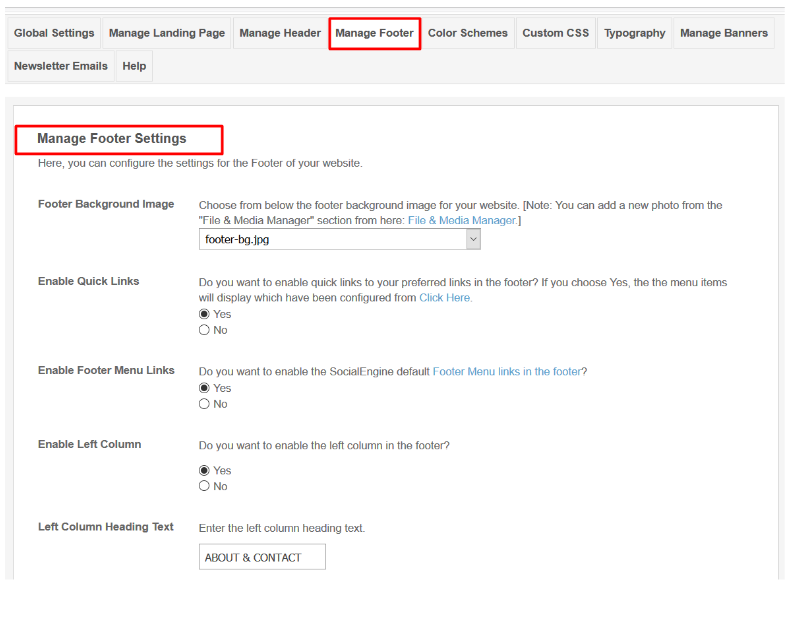
The Footer for this theme is uniquely designed for which you can give various settings on your website from this section.
These settings will affect the footer of your website.
→ Left Column
→ Right Column
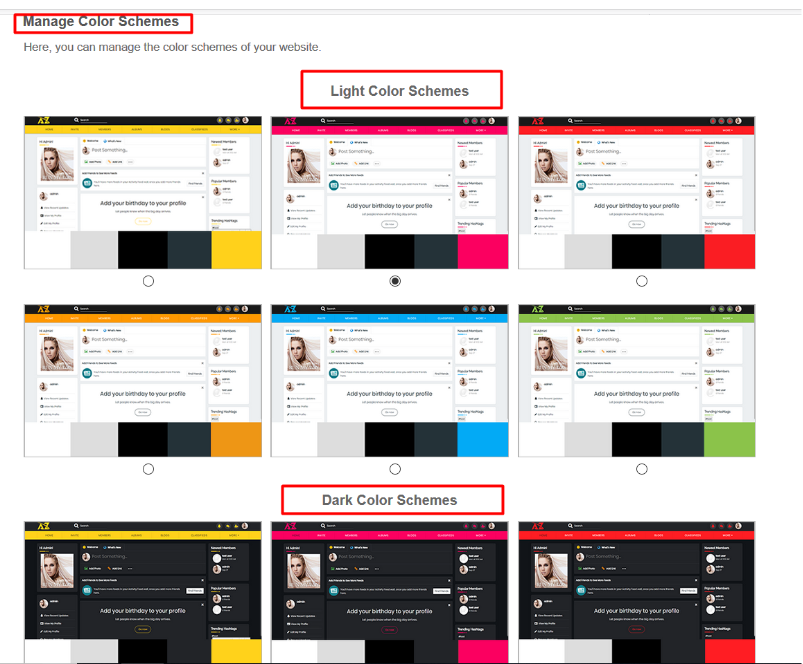
These settings affect in this theme only on your site.You can choose Custom Theme Color whether you want to create new or you may choose from the 9 pre-built Light and Dark Color Schemes.
You can set various settings under this section :
Header Styling Settings:
You can set all these as per your requirement:
Header Background Color
Header Background Color
Main Menu Background Color
Main Menu Link Color
Main Menu Background Hover Color
Main Menu Link Hover Color
Mini Menu Link Color
Mini Menu Link Hover Color
Mini Menu Icon Background Color
Mini Menu Active Icon Background Color
Mini Menu Icon Color
Mini Menu Icon Active Color
Header Searchbox Border Color
Header Searchbox Text Color
Background Color for User section in Main Menu
Font Color for User Section in Main Menu
Footer Styling Settings:
You can set all these as per your requirement:
Footer Background Color
Footer Link Color
Footer Link Hover Color
Body Styling Settings:
You can set all these as per your requirement:
Theme Color
Body Background Color
Font Color
Font Light Color
Heading Color
Link Color
Link Hover Color
Content Header Background Color
Content Header Font Color
Content Background Color
Content Border Color
Form Label Font Color
Input Background Color
Input Font Color
Input Border Color
Button Background Color
Button Background Hover Color
Button Font Color
Button Font Hover Color
Comments Background Color
You can add the custom CSS for this theme. We recommend you to add your CSS changes in this section instead of Theme.css file so that you do not lose your changes when you upgrade this theme.

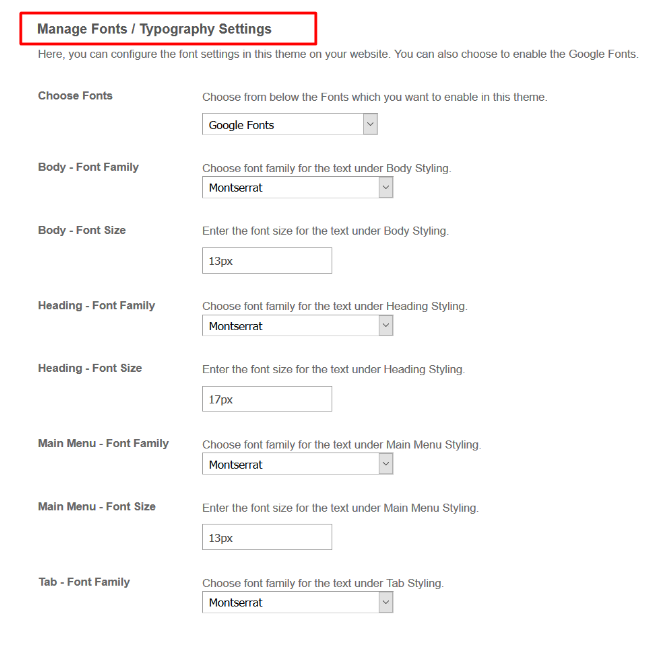
You can choose Fonts, Font Family, Font Size for Body, Headings, Main Menu and other Tabs.
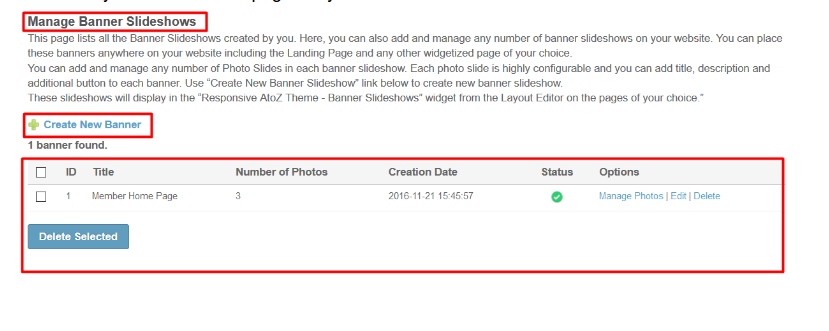
You can add and manage any number of Photo Slides in each banner slideshow. Each photo slide is highly configurable and you can add title, description and additional button to each. These slideshows will display in the “Responsive AtoZ Theme - Banner Slideshows” widget from the Layout Editor on the pages of your choice.”
AtoZ Theme comes with the Help Section from where you can get answers to all your queries through FAQs and any kind of support. This feature makes this theme different from other themes. You can also subscribe the newsletter or can write your valuable reviews for this theme from this section.
14. Layout Editor
Layout Editor is the only place for our SES Products where you can place various widgets for your pages and configure those widgets according to your requirement as well.
There are certain widgets for this theme which are categorized as “SES - Responsive A to Z Theme - WIDGET_NAME” format. You can place these widgets at any page according to your requirement.

Waoo! You have completed the installation and setup of this theme now and the theme is set on your site.
Installation of this themeis very easy, but if you still need our expert to install this theme for you, then you can purchase the service from here: https://www.socialnetworking.solutions/social-engine/socialenginesolutions-plugin-installation/