Still not found answer to your query, contact our support team at
Advanced Banner Plugin enables you to have very beautiful, elegant and attractive slideshow on your website.Unlimited Slideshows makes the look and design even more awesome, eye catching and appealing. Each banner in this plugin can have upto unlimited slides, background color,slides Opacity, description, buttons radius, 2 CTA buttons. The header of your website can be chosen to be shown inside or outside the banner, thereby making this plugin more robust and easy to use and setup on your website as per your requirements.
Everything can be enabled / disabled and configured from the admin panel including the choice of background color, slides, CTA button colors, font colors, font family for captions, description, etc. You can also choose the banner to be shown in full width or not. The delay time, ordering of slide (admin selected order / random order), count of slide, etc settings can easily configured from admin panel for each banner.
Please read more about this Plugin here:
https://www.socialnetworking.solutions/social-engine/advanced-banner-plugin/
Watch demo here: https://demo.socialnetworking.solutions/pages/advancedbanner
This tutorial will walk you through steps you need to follow to install the Advanced Banner Plugin on your website.
** This tutorial assumes that you are already logged in to the Admin Panel.
Installation of this plugin is very easy, but if you still need our expert to install this plugin for you, then you can purchase the service from here: https://www.socialnetworking.solutions/social-engine/socialenginesolutions-plugin-installation/
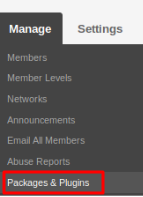
In the Main menu, click on the tab Manage and select “Packages & Plugins”.
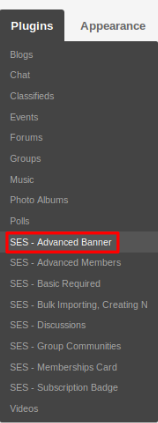
Activate this plugin from the Global Settings section of this plugin. These settings will affect all the members in your community.
Under this section you can Add, Manage, Enable/Disable, Edit, Delete the Banners created by you. All the banners created by you will get displayed under this section.
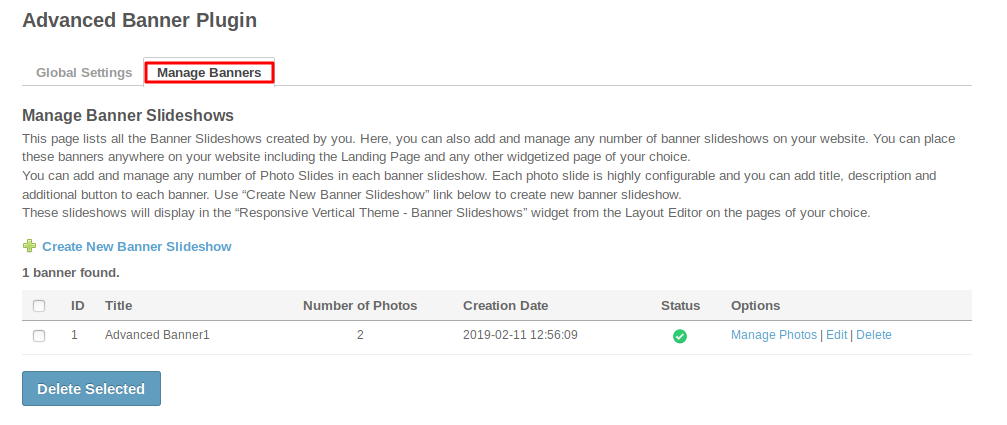
You can also place these Banners on any page/pages of your choice which will be visible on your website to make it more attractive and trending.
To create the slideshow you can click on “Create New Banner Slideshow” link on this page. To display the slideshow on your desired page, follow the step 7 of this tutorial.
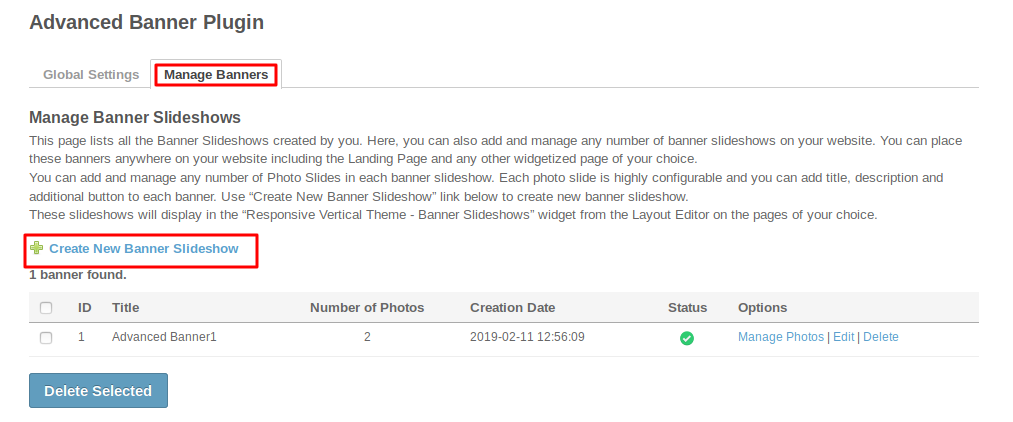
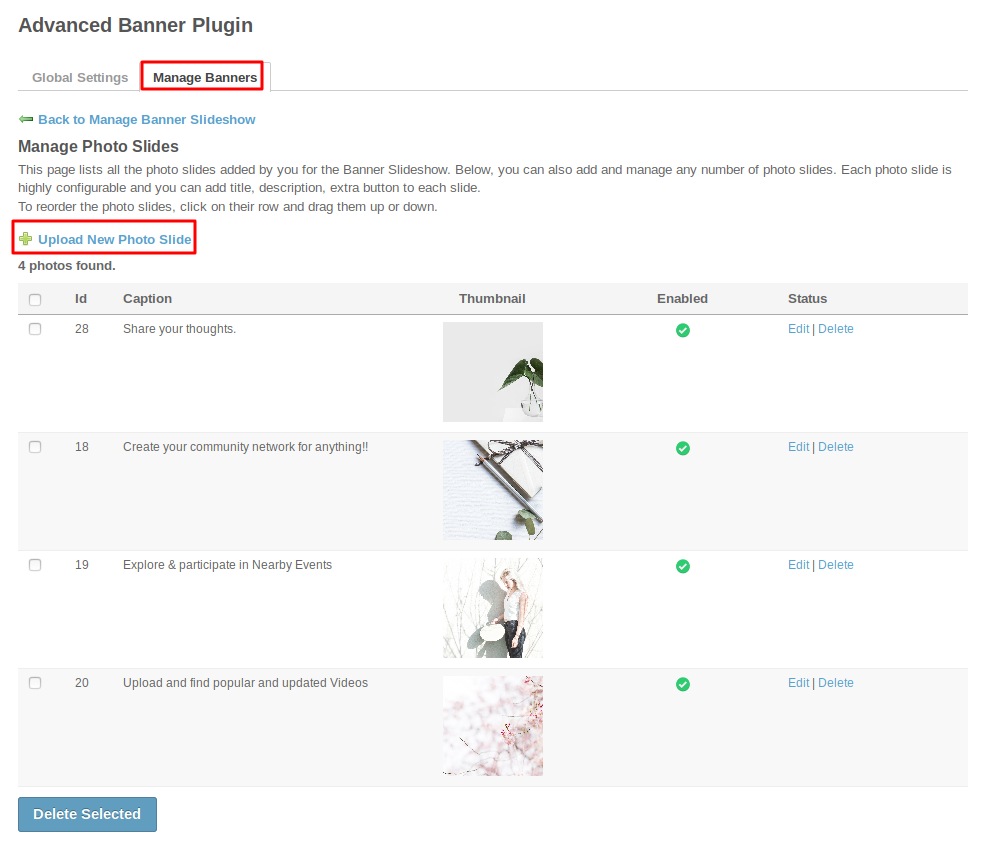
Here you can add various photos slides for the desired slideshow. You can also manage those photos slides by configure different settings for them.
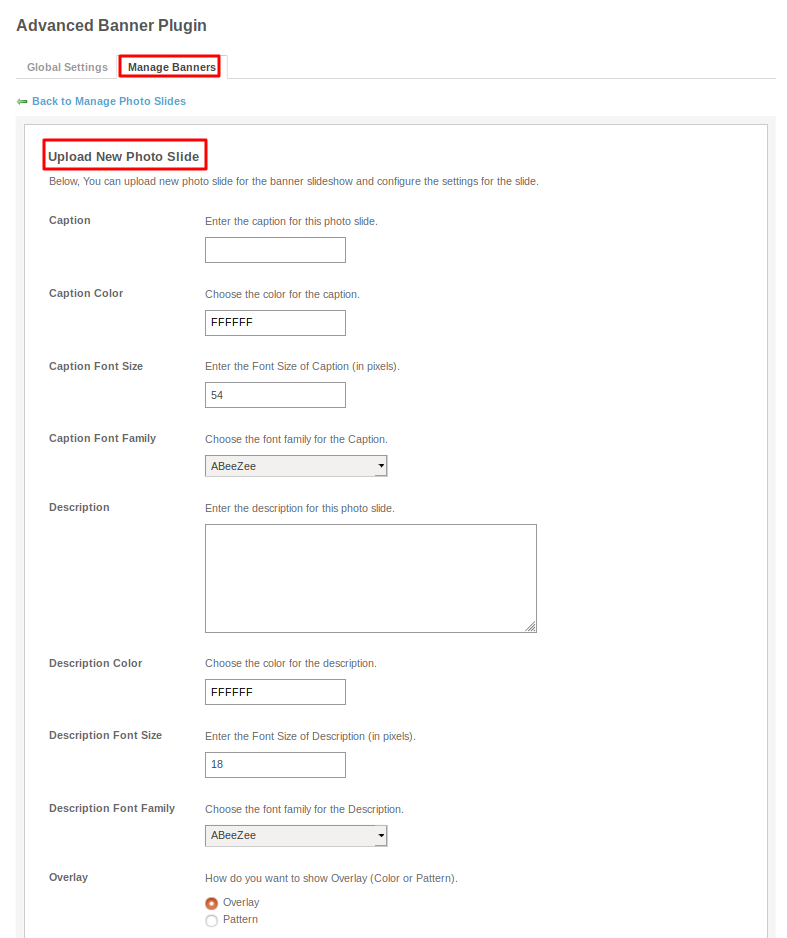
Upload new photo slide and fill up all the details in the form which you want to be in your slide. There are two options which will give your slide an attractive look and those are overlay or pattern among which you can select one and do the further settings related to them.
In order to create Banner for the desired page, first go to Layout Editor and then you can place the Widget ‘SES - Double Banner Slideshow’ on the page of your choice.
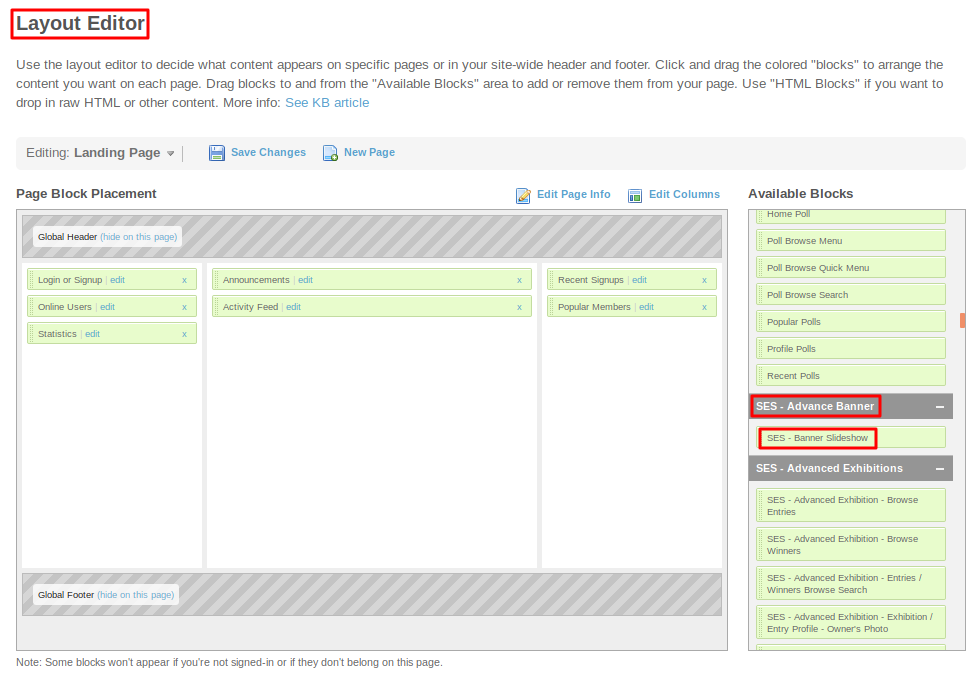
You can also configure the various settings for the Banner through this widget such as Height, Slide duration, and other required settings to create your banner.
After placing the widget, go on the page on which you have placed the widget from Layout Editor in step 7 above. The banner which you have created will get appeared here. If you need to alter your configurations, then you can repeat above steps.
Wao! You have completed the installation and setup of this plugin now and the Slideshow should work fine on your site.
Installation of this plugin is very easy, but if you still need our expert to install this plugin for you, then you can purchase the service from here: https://www.socialnetworking.solutions/social-engine/socialenginesolutions-plugin-installation/
We provide extremely cost-effective development, designing, customization, hosting and marketing without compromising on quality. We have strong domain experience in SocialEngine, Zend Framework, Mobile Apps, Web designing, E-Commerce, Application development and Product R&D – Making us ideally suited for outsourcing your IT needs!
