Still not found answer to your query, contact our support team at
“Live news teaches you some incredibly strong lessons: that every day is a new day, and it's never too late to fix something”. Similarly, this News / RSS Importer & Aggregator Plugin will keeps you updated everyday, everytime. As this plugin provides you with some advanced features like you can create news with custom publish date, continue reading option, locations, multiple photos upload, reviews, etc. and also you can add RSS links which will help you to fetch many latest news at a single time and also your users can subscribe these RSS news for which they will get the timely updates.
News / RSS Importer & Aggregator Plugin provides you with unique and attractive views of news which will enable you to highlight and showcase your news easily on your website. Here, you can create the news in different categories according to the interests of your users which will help them to get the latest news of their interests.
Please read more about this Plugin here: https://www.socialnetworking.solutions/social-engine/news-rss-importer-aggregator-plugin/
Watch demo here: https://demo.socialnetworking.solutions/news
This tutorial will walk you through steps you need to follow to install the News / RSS Importer & Aggregator Plugin on your website.
** This tutorial assumes that you are already logged in to the Admin Panel.
Installation and Setup of this plugin is very easy, but if you still need our expert to install this plugin for you, then you can purchase the service from here: https://www.socialnetworking.solutions/social-engine/socialenginesolutions-plugin-installation/
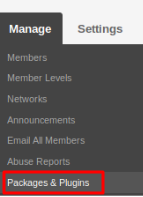
In the Main menu, click on the tab Manage and select “Packages & Plugins”.
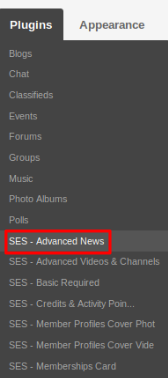
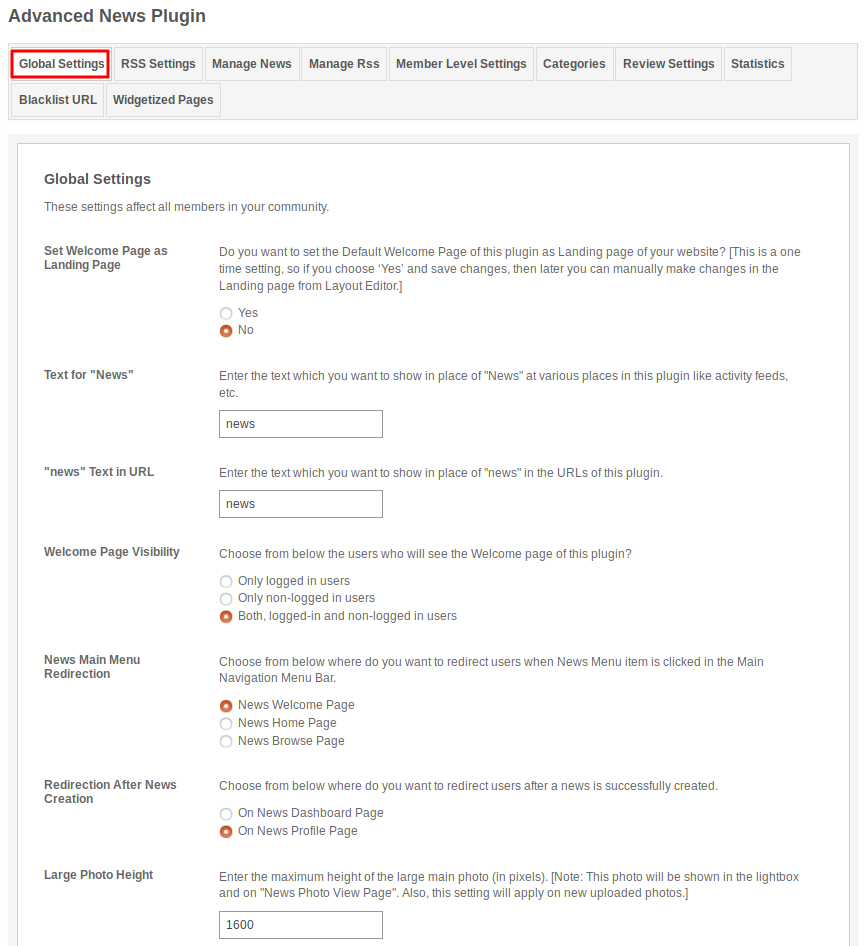
Activate this plugin from Global Settings section of this plugin. In this section, you can change the settings for various different fields like Text for "News" in URL, “news” Text in URL, Welcome Page Visibility, News Main Menu Redirection, Redirection After News Creation, Enable Location, Proximity Search Unit, Enable Custom News Publish Date, Continue Reading Button Redirection for Non-logged in Users and many more…
These settings are used for enabling / disabling the RSS and in both the conditions you have to enter the API key for RSS. If you enable the RSS then, you can do the various settings related to the RSS as enable / disable the subscription for it, can enter the maximum number of News fetched from it, can enter the number of Cron Jobs Schedule days and also enter the number of days after which your old news were removed.

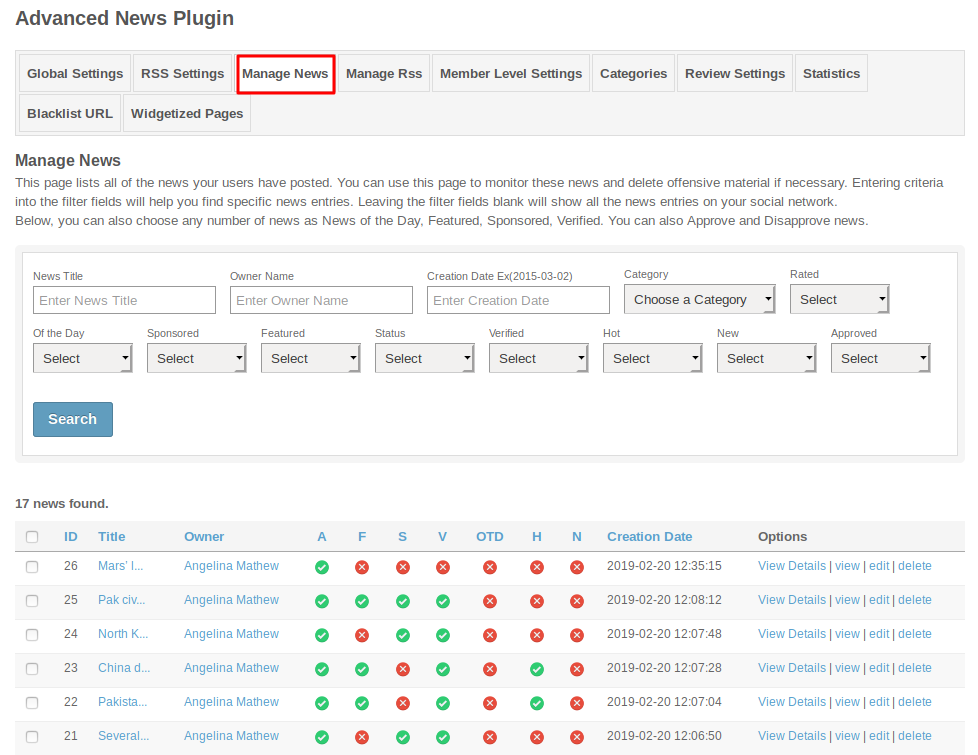
In this section, you can manage all the news which were created by your users till now. You can delete the news which you find incorrect/offensive. Here you can search any news by filling various fields like news title, owners name, creation date, etc. and also you can enable/disable any news as featured, sponsored, verified, of the day, hot and new.
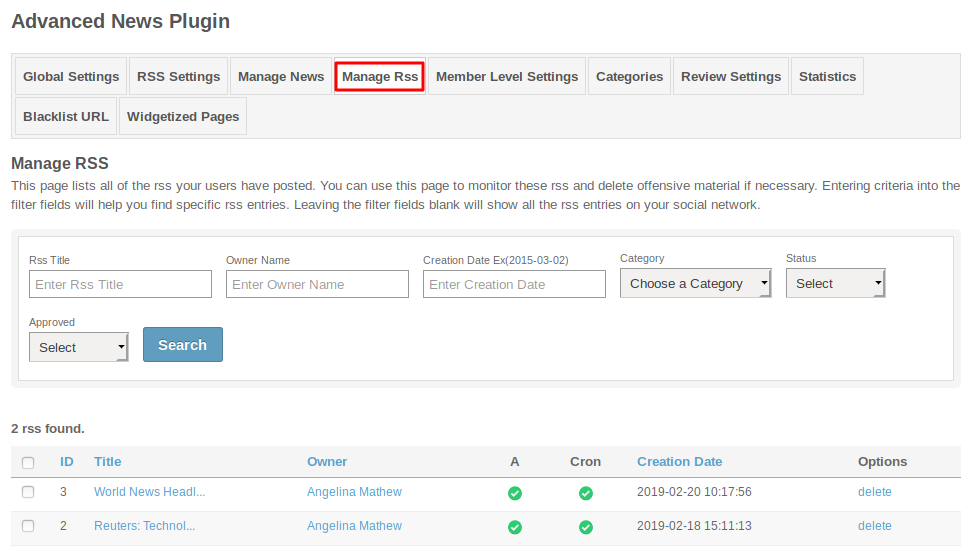
This section lists all the RSS created by your users. You can delete the RSS which you find incorrect/offensive. Here you can search any RSS by filling various fields like rss title, owners name, creation date, etc. and you can enable / disable Cron for any RSS.
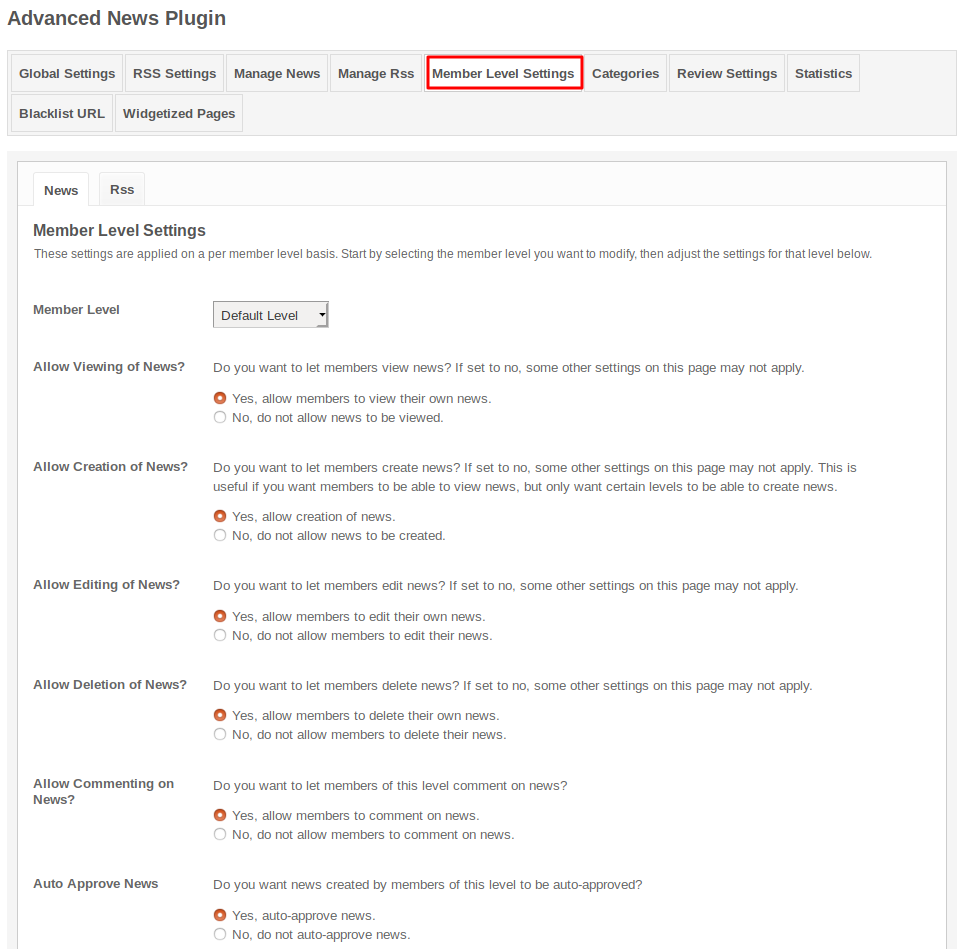
These are the settings which are based on the different member levels configured by the admin of the site. These settings allow you to view, create, edit, delete and comment on the News and also allow to do the News Privacy, News Comment Options and many more settings for News and RSS separately.
This section is divided into two parts, one is Categories and the other one is Form Questions. In Categories, you can modify or delete the existing categories and also add new categories by filling up the form given at this page. 2nd & 3rd Level Categories are also supported.
 for Advanced News.png)
In Form Question, you can add various Profile Questions in order to get some more knowledge about the News creator for particular profile type and also you can add question to existing profile type or can create new profile type or can rename the profile type.
 for Advanced News.png)
This section lists four sections, in which you can change the settings related to the reviews and ratings.
Review & Ratings Settings
This section lists the settings for the review. These settings include Allow Reviews, Allow Reviews on Own Profile, Allow Pros in Reviews, Allow Cons in Reviews, Allow Description in Reviews, Enable WYSIWYG Editor for Description, Allow Recommended Option, etc..
.png)
Manage Reviews
In this section, you can manage various reviews which were created yet. You can delete the reviews which you find incorrect/offensive. Here you can search any reviews by filling various fields like review title, owners name, creation date, etc. You can mark any review as featured, verified and of the day.
.png)
Member Level Settings
These are the settings which are based on the different member levels configured by the admin of the site. These settings allow you to view, write, edit, delete and comment on the reviews.
.png)
Rating Parameters
Under this section, you can add the rating parameters for the different categories and can create different profile types for the Reviews.
.png)
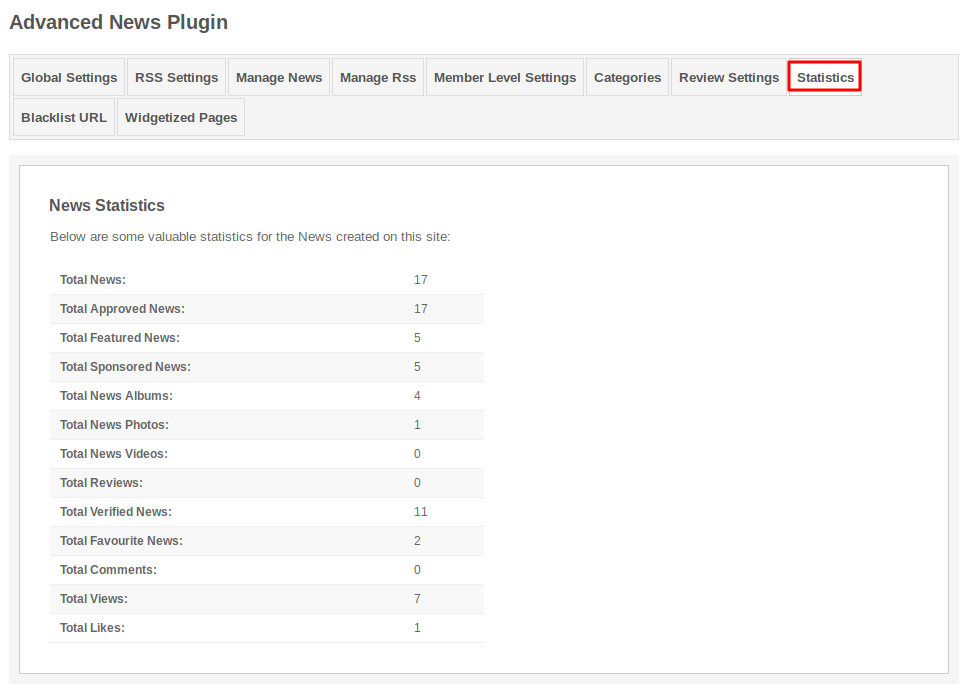
It will create the valuable statistics for the News that users have created on your website like total news, total approved news, total featured news, total views, total likes, etc..
This page lists all the URLs which is blacklisted by the Admin. You can blacklist the URLs for RSS, if you find then offensive / irrelevant and also you can enable / disable the status of URLs.
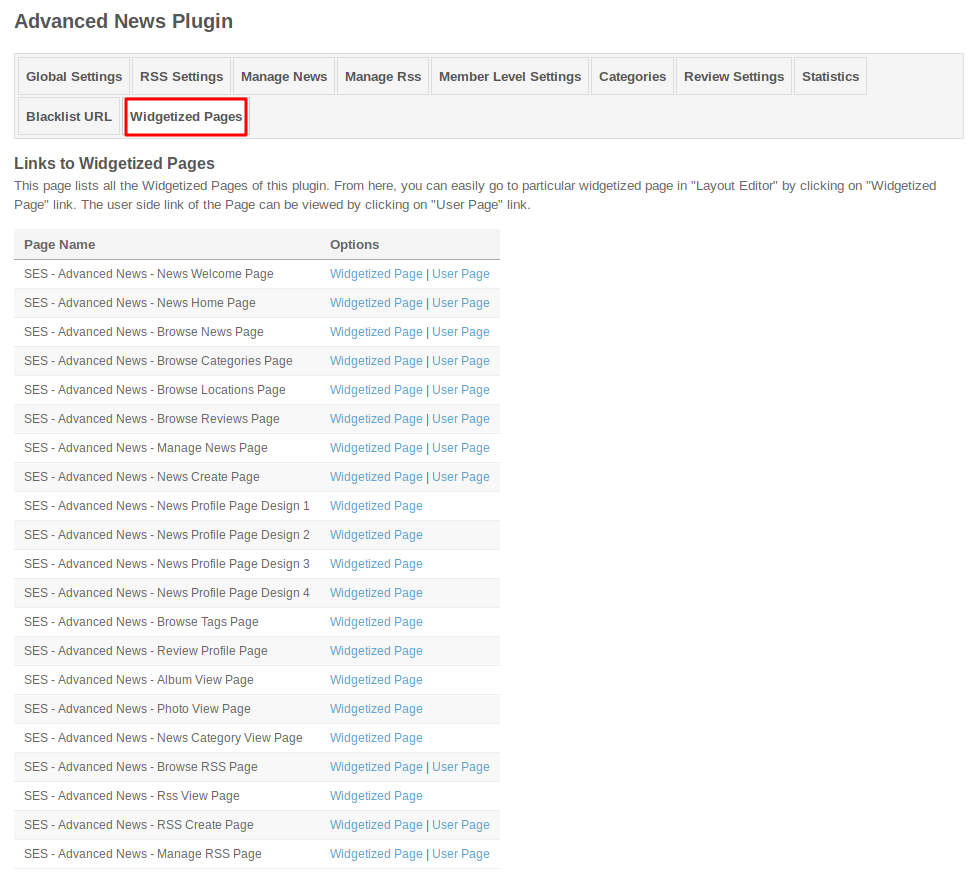
This page lists all the required Widgetized Pages which are present under Layout Editor for this plugin.
With the help of this section you can go to either Widgetized page or User page directly by clicking on their links respectively.
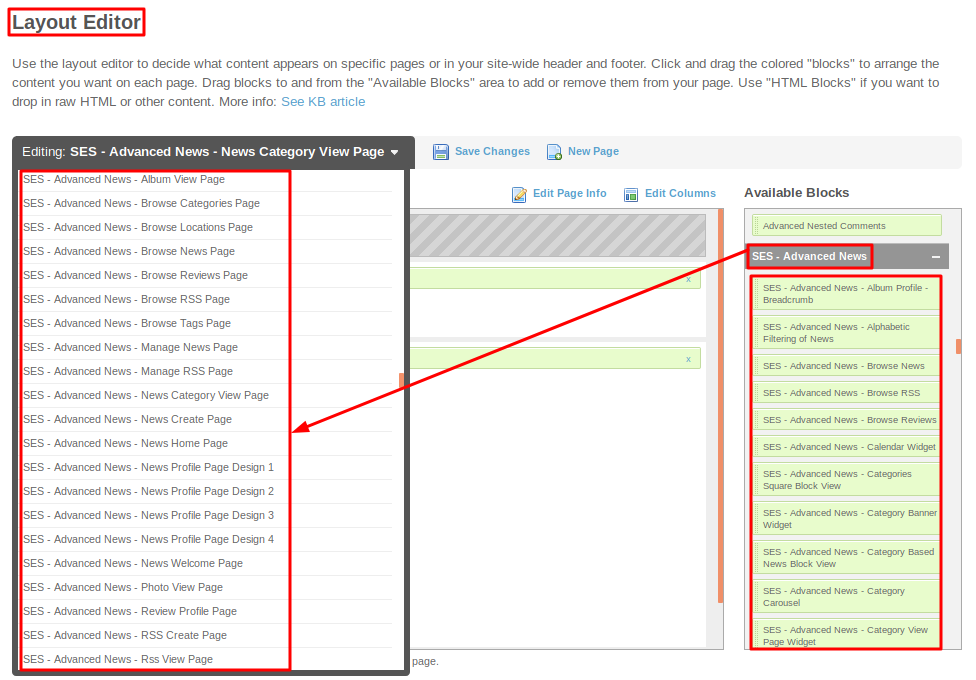
Layout Editor is the only place for our SES Products where you can place various widgets for your pages and configure those widgets according to your requirement as well.
There are certain pages for this plugin which are categorized as “SES - Advanced News - PAGE_NAME” in which you can place any widget that are also categorized as “SES - Advanced News - WIDGET_NAME” format.
Great! You have completed the installation and setup of this plugin and now you are able to create news and rss of your choice.
Installation of this plugin is very easy, but if you still need our expert to install this plugin for you, then you can purchase the service from here: https://www.socialnetworking.solutions/social-engine/socialenginesolutions-plugin-installation/